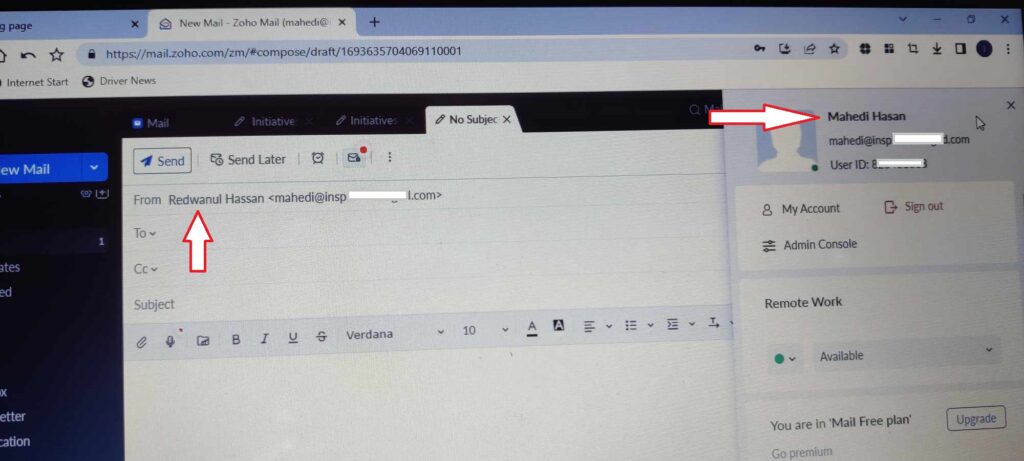
Have you ever sent an email and noticed that your recipient saw the wrong name displayed? Well, it can be embarrassing and unprofessional when your email displays an outdated or incorrect name. Fortunately, you can easily change your display name in outgoing emails!
However, in this guide, we will walk you through the steps to update your display name, ensuring that your emails reflect the right identity.

Step 1: Access Your Email Settings
The first step to changing your display name is to access your email settings. Follow these simple steps:
- Click on Settings: Start by logging into your email account and navigating to the settings menu. The location of the settings may vary depending on your email provider, but it is typically represented by a gear or a settings icon.
- Go to Mail Settings: In the settings menu, you’ll find various options and preferences. Look for the section related to email or mail settings.
Step 2: Send Mail As Configuration
Once you’re in the mail settings, you’ll need to configure the “Send Mail As” feature. This feature allows you to customize the way your name appears in outgoing emails:
- Click ‘Send Mail As’: At the mail settings, search for the “Send Mail As” or a similar option. This is where you’ll manage your email and display names.
- Edit the Email Address: You should see a list of email addresses that you can send mail from. Find the email address for which you want to change the display name and click the ‘Edit’ icon or link associated with it.
Step 3: Update the Display Name
Now that you’ve accessed the settings for your specific email address, you can proceed to change the display name:
- Search for the ‘Display Name’ Option: In the settings for the chosen email address, find the ‘Display Name’ text box. It might have your current display name or an empty field, depending on your previous settings.
- Provide Your Preferred Display Name: Enter the display name you want to appear when you send emails from this address. This can be your full name, a nickname, or any name that you prefer.
- Save the Changes: After entering the new display name, look for a ‘Save’ or ‘Update’ button and click it to save your changes.
Conclusion:
Changing your display name in outgoing emails is a simple process that can help you maintain a professional and accurate online identity.
Whether you want to use your full name or a nickname, it’s essential to ensure that your emails reflect the correct information.
However, by following the steps outlined in this guide, you can easily update your display name and make a positive impression on your recipients.
I’m Md Tangeer Mehedi, and I’ve been actively engaged in cold emailing for the past three years. My primary focus is appointment setting with B2B clients and helping businesses set up their cold email systems. In this blog, I will share real-life problems I’ve encountered in my work and provide solutions to these challenges. I hope you enjoy reading my blog and find it helpful.