Here is the step-by-step guide on how to self-connect your Google Workspace email to Instantly AI. I took screenshots at each step while working, so just follow the guide and screenshots, and you can do this on your own.
If you miss any point, Instantly AI may remove your email. So, be careful about it. If you need any help setting up properly, please contact me.
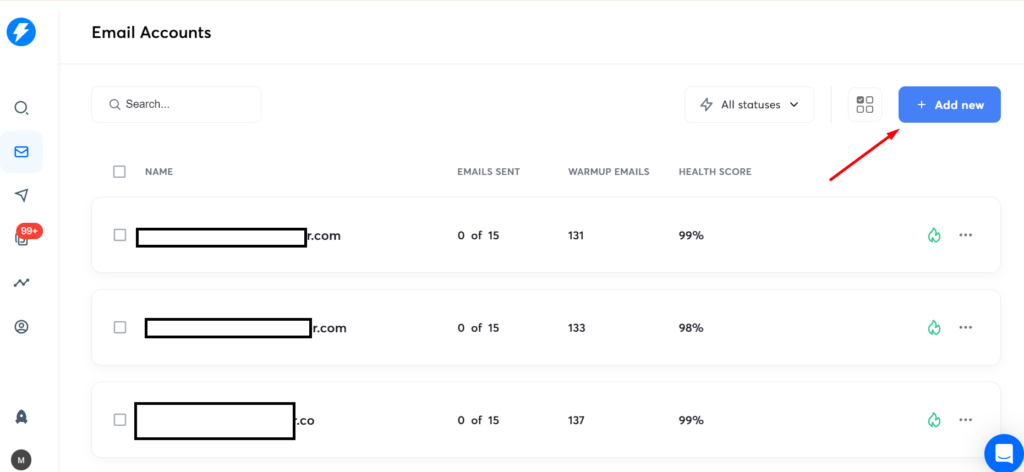
Email Accounts > Add New
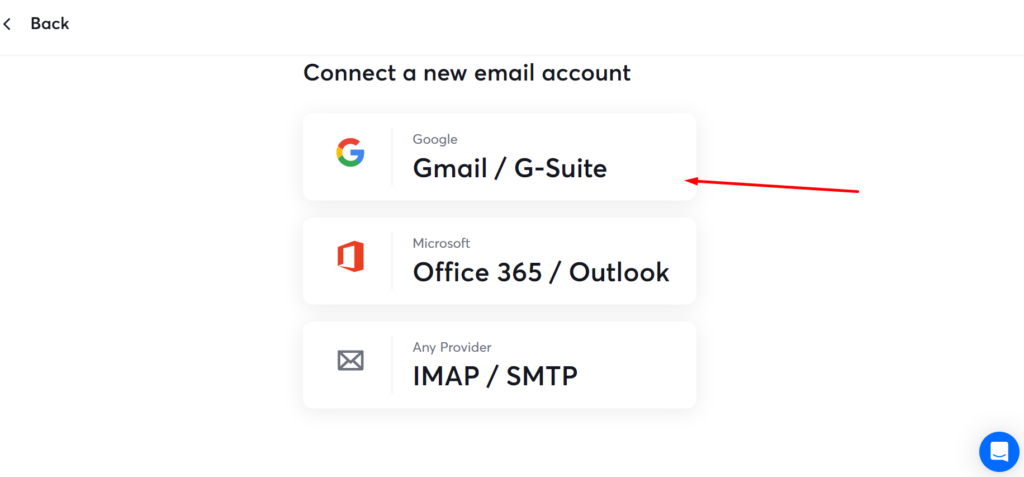
Connect a new email account
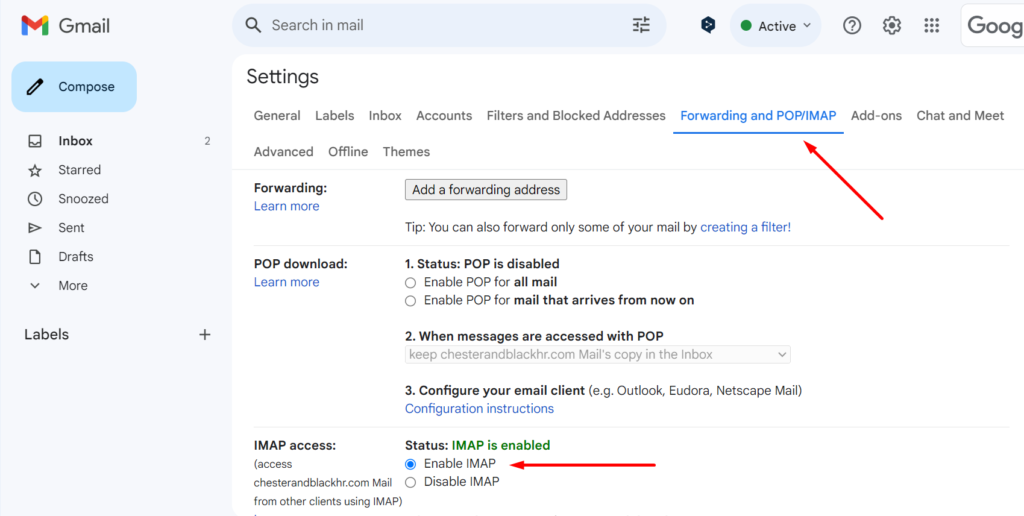
Enable IMAP access
Go to Gmail > Settings >
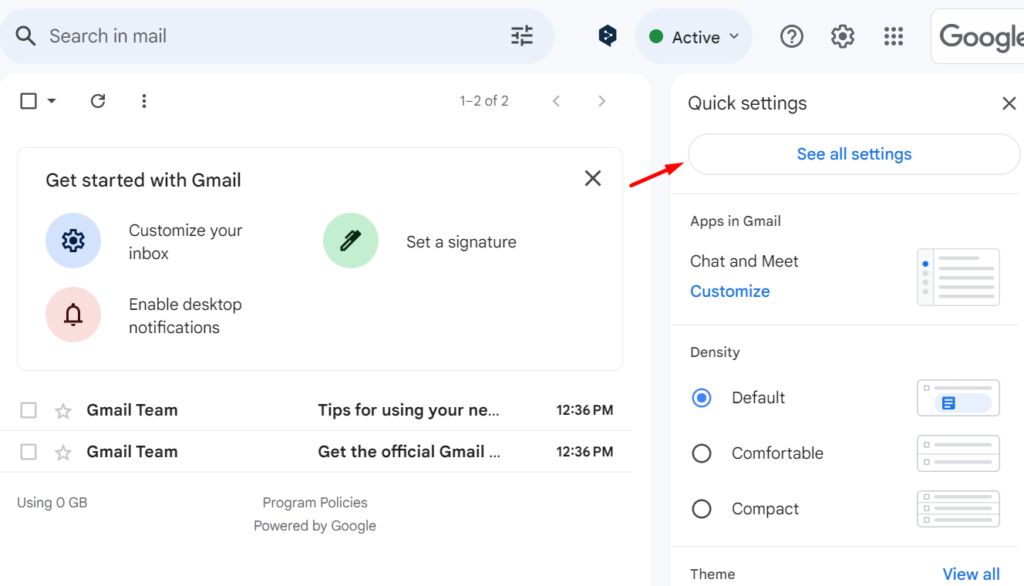
Forwarding and POP/IMAP > IMAP access: > Enable IMAP
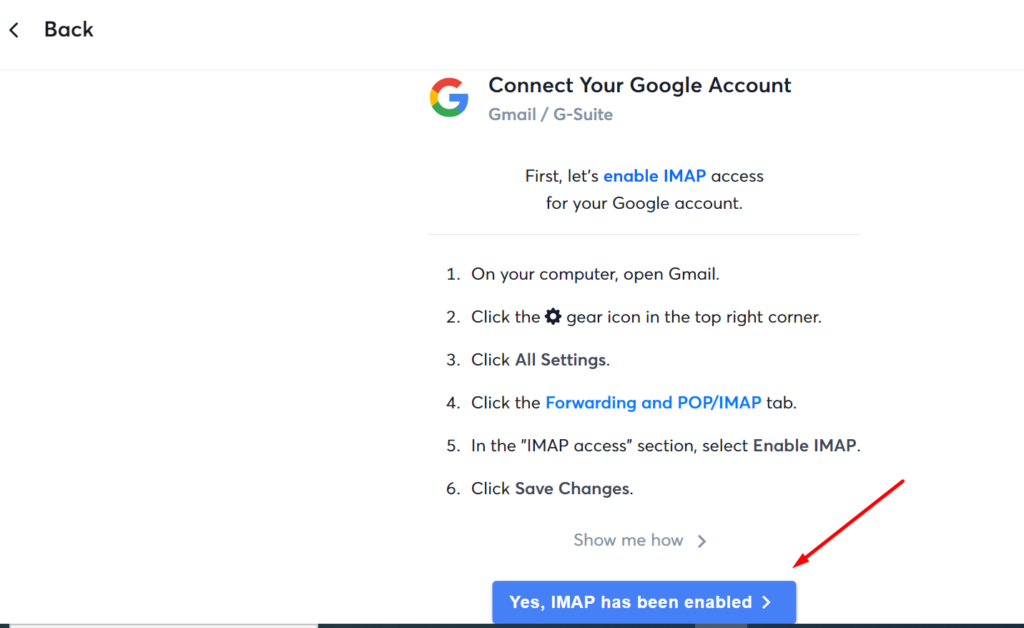
Back to instantly and hit Yes.
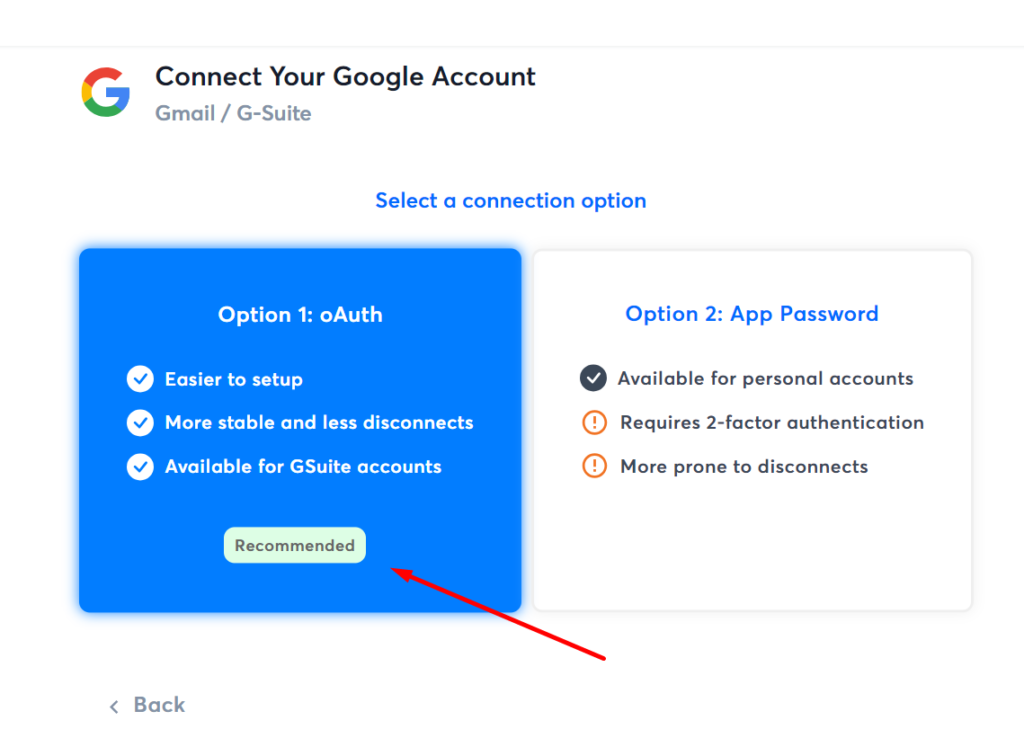
Option-1:
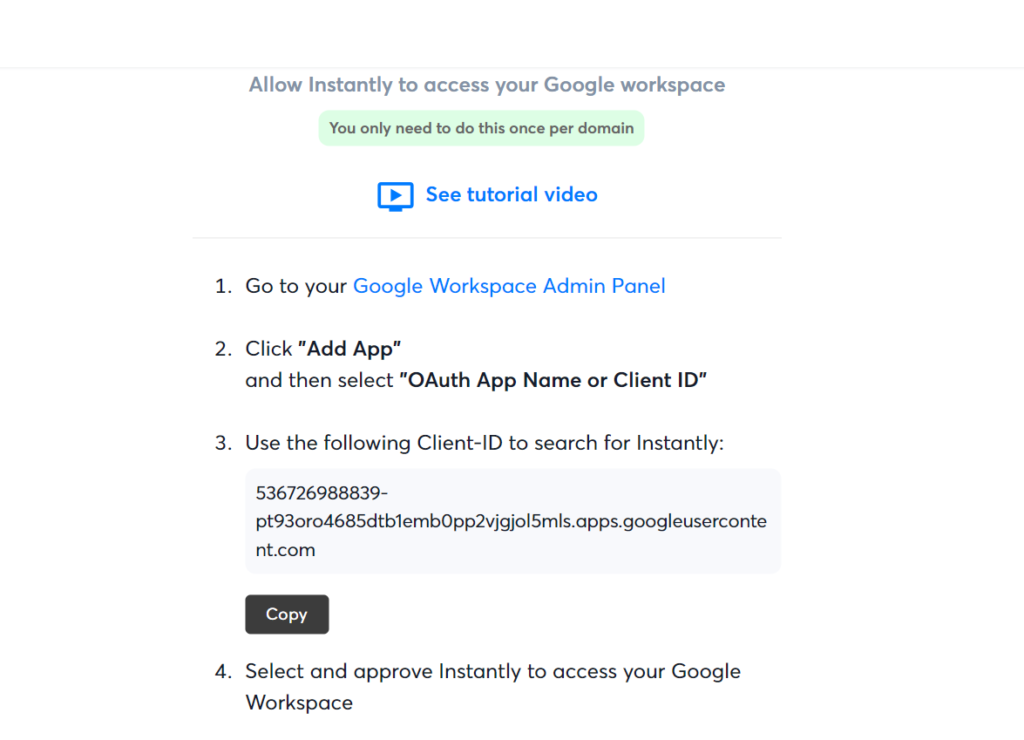
Then go to the google workspace. Security > API Controls > App Access Control
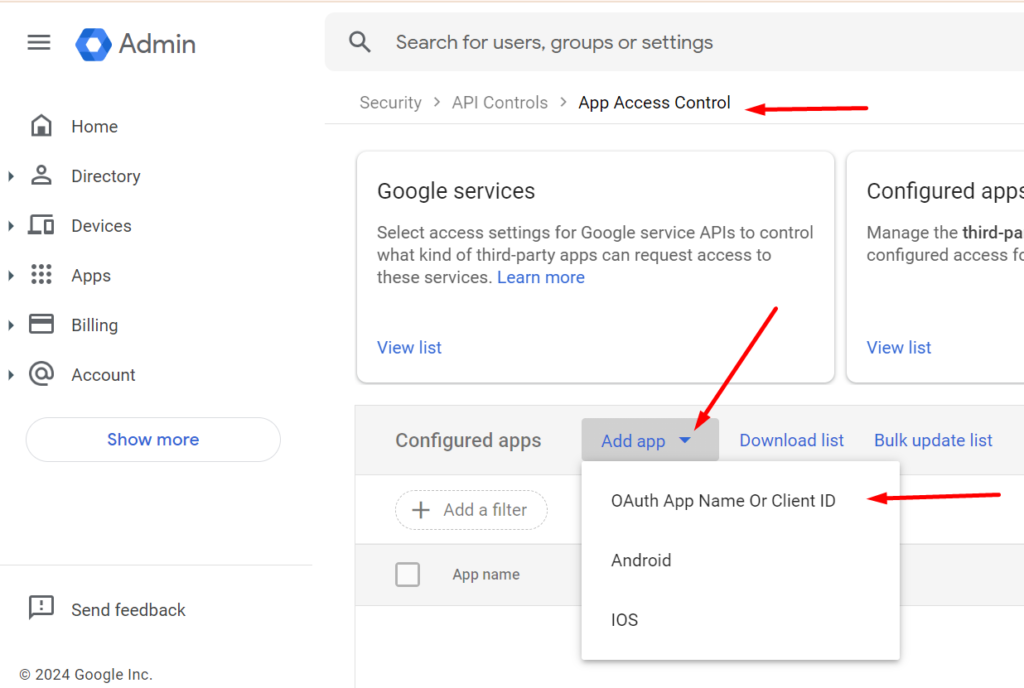
Copy the code from instantly and search on google workspace
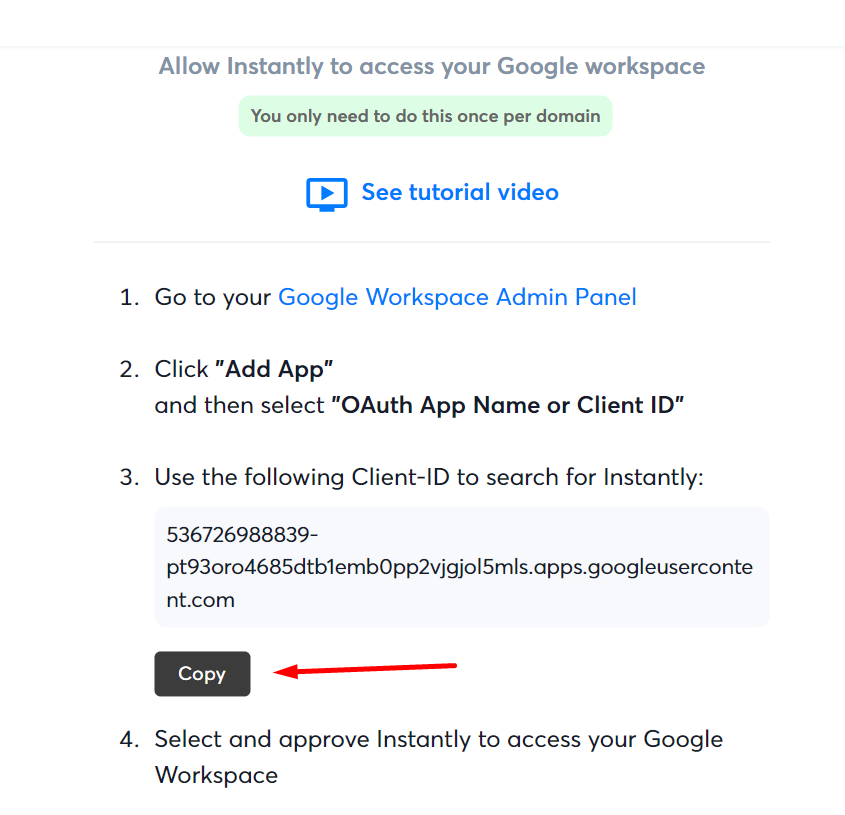
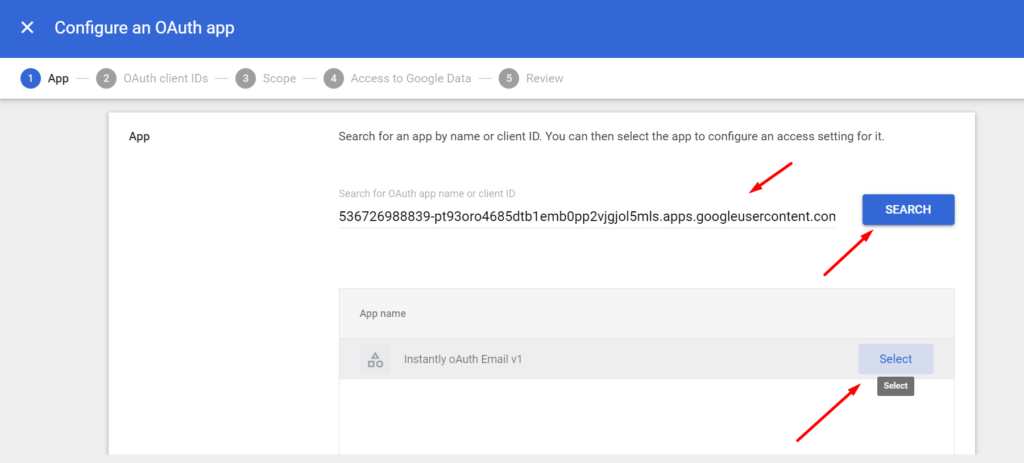
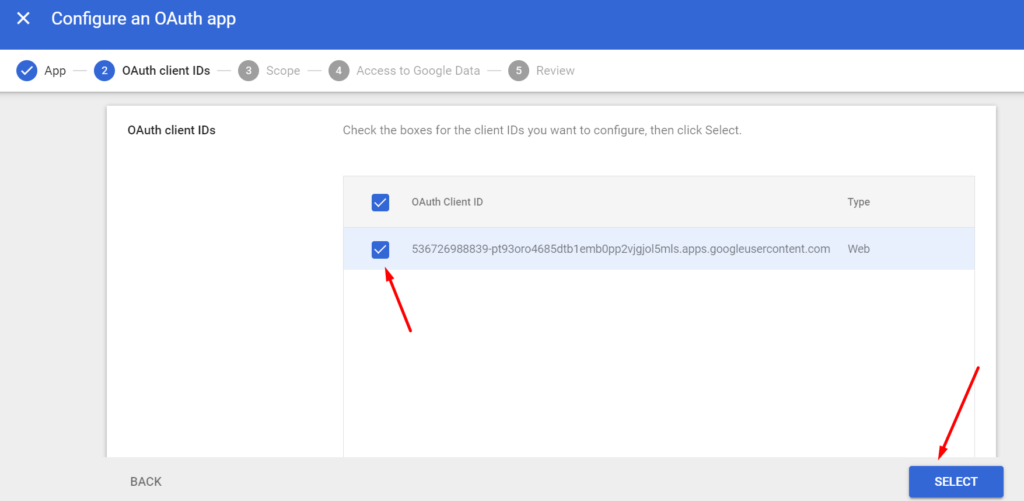
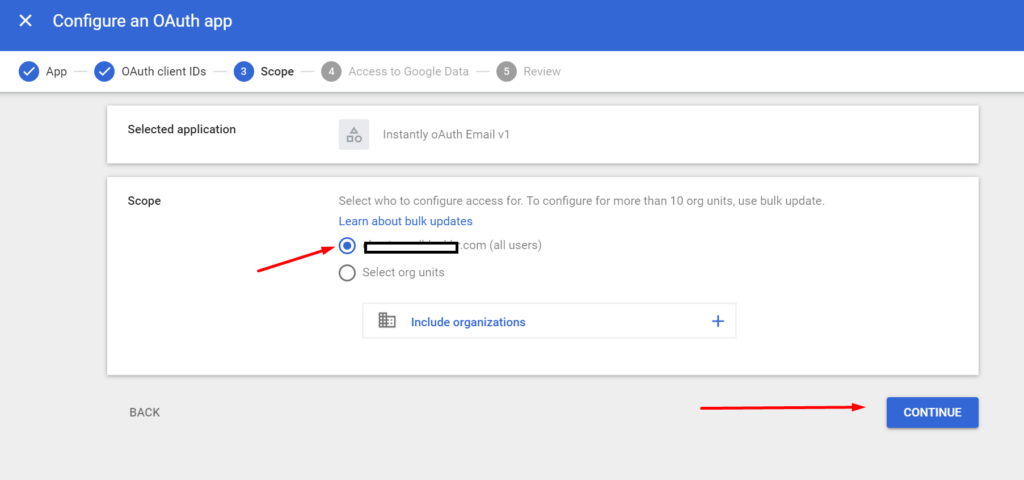
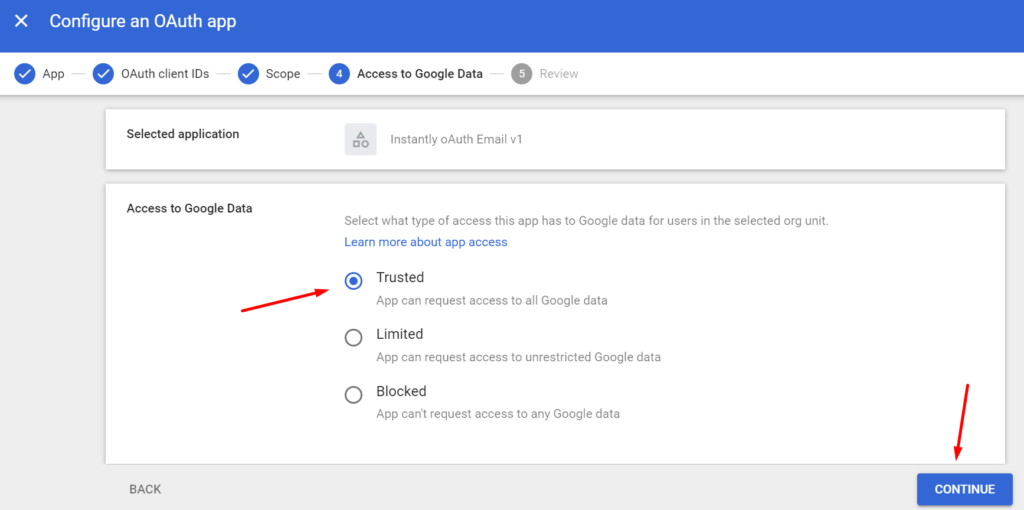
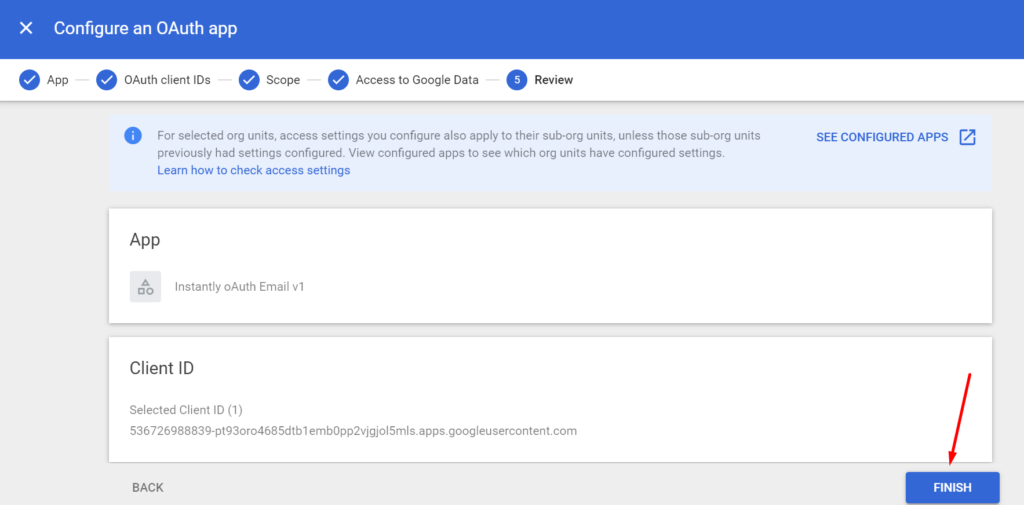
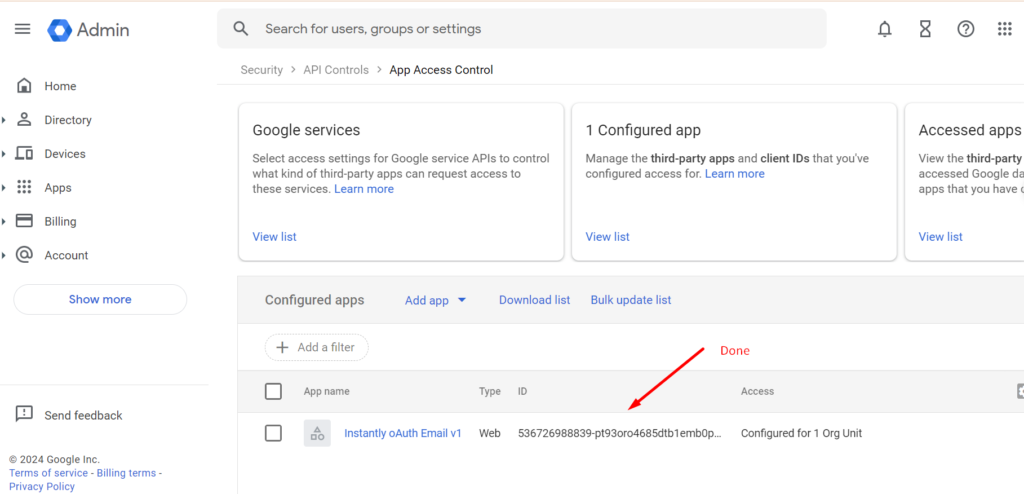
Then go back to instantly email login page, login email using same browser and hit login.
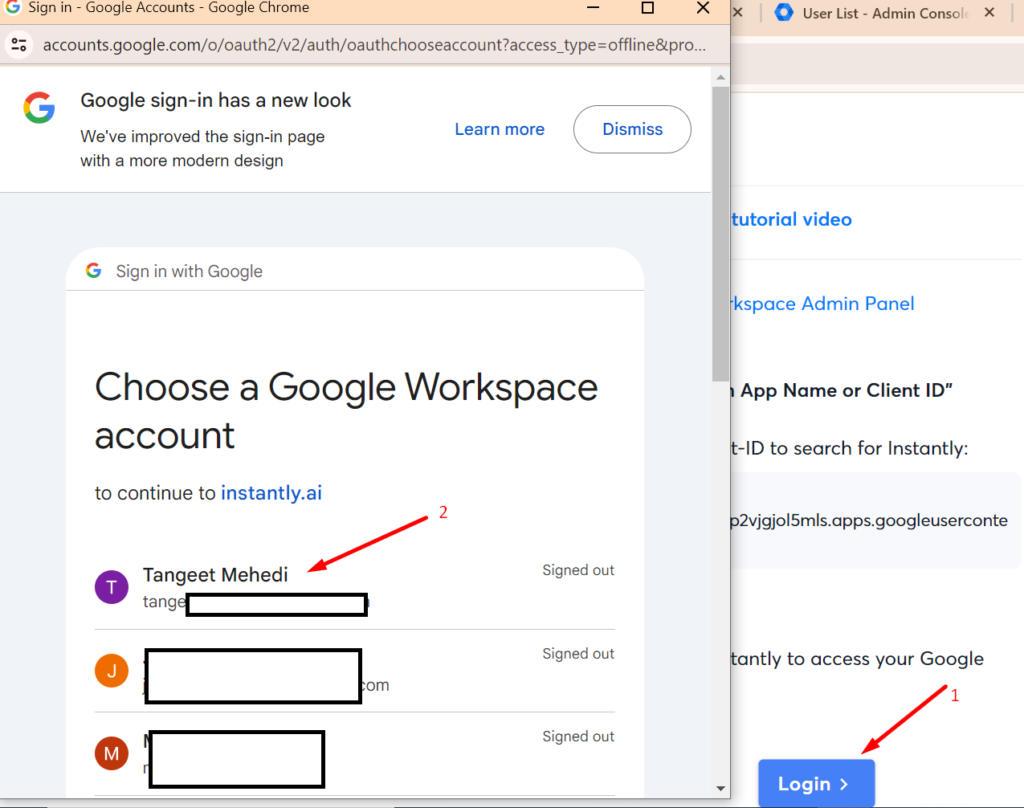
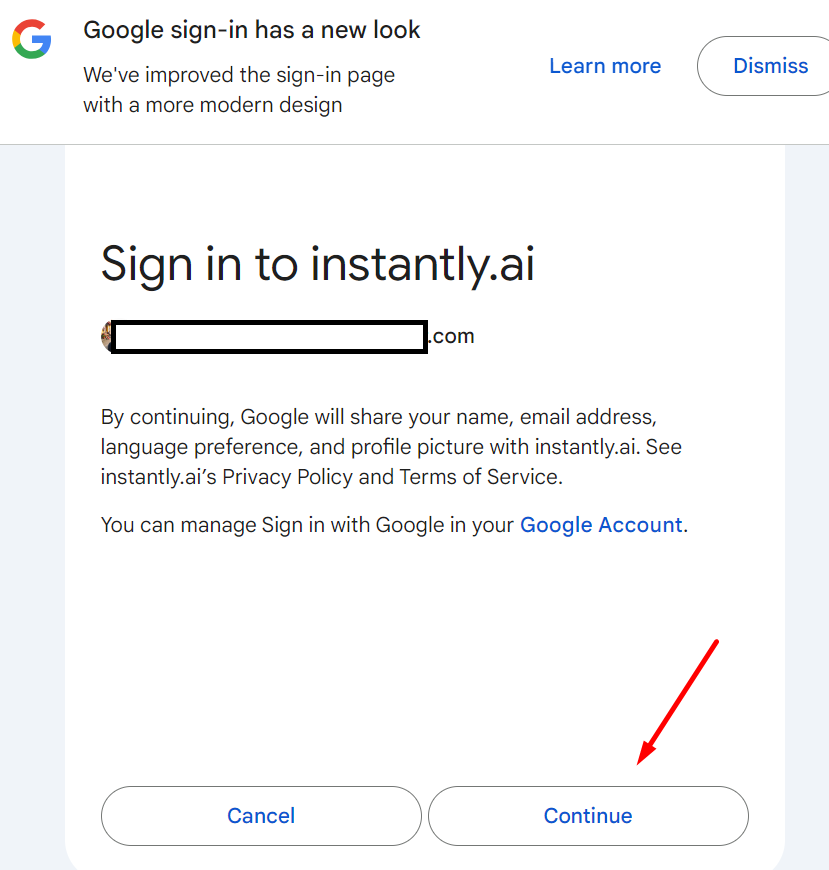
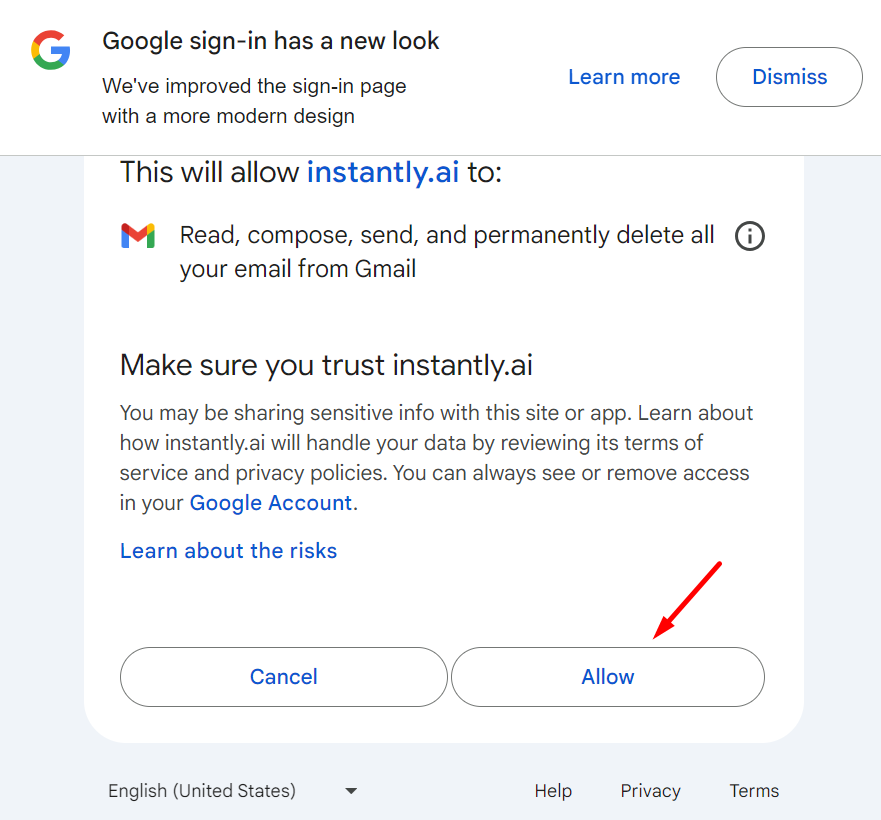
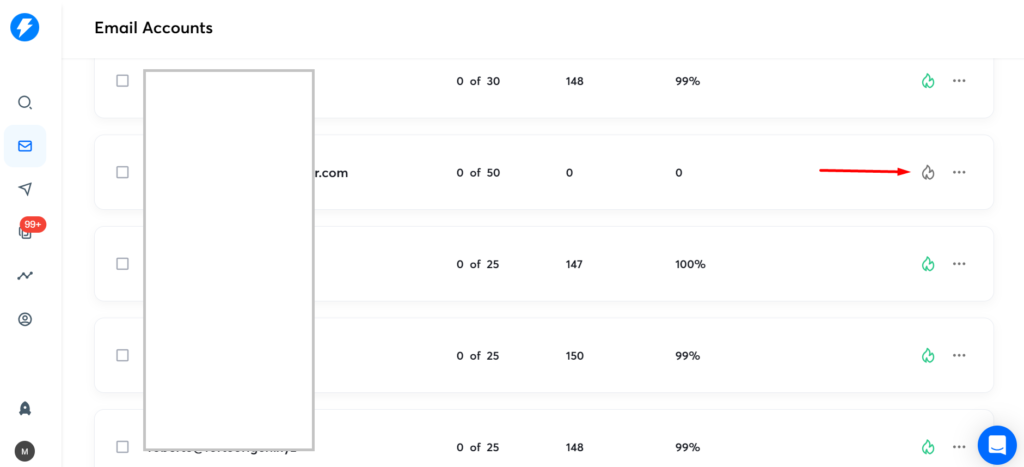
Now the email is added to instantly. and then active warmup by clicking this.
You May Check: Step-by-Step Guide: Setting Up DMARC, SPF, and DKIM for Email in Namecheap and Google Workspace

Hi, I’m Md Tangeer Mehedi — a Cold Email Outreach Specialist. I help B2B brands attract new leads and clients with proven outreach strategies. My focus is on appointment setting and building cold email systems that deliver consistent results.
