Using a custom tracking domain is essential for maintaining a strong email marketing strategy. By utilizing a domain specific to your brand, you can improve deliverability, enhance trust, and gain better control over your email campaigns. Here’s a comprehensive guide on why a custom tracking domain is important and how to set it up in Instantly.ai
Importance of a Custom Tracking Domain
- Improved Deliverability
- Reputation Isolation: Ensures your sending reputation is not affected by other users, protecting your email deliverability.
- Avoiding Blacklists: Reduces the risk of being impacted by blacklists that target shared tracking domains.
- Branding and Trust
- Brand Consistency: Maintains consistency with your brand, making your emails look professional and trustworthy.
- Increased Trust: Recipients are more likely to click on links that reflect your own domain, reducing spam or phishing concerns.
- Enhanced Tracking and Reporting
- Unique Data: Provides accurate and relevant analytics specific to your email campaigns.
- Detailed Insights: Offers more detailed recipient behavior insights, allowing for effective optimization.
- Better Control and Management
- Custom Configuration: Allows you to manage and configure tracking settings according to your needs.
- Security: Gives better control over your domain’s security settings, preventing unauthorized access.
- Avoiding Shared IP Issues
- Dedicated Environment: Ensures that issues from shared IPs do not affect your email deliverability.
How to Set Up a Custom Tracking Domain in Instantly
Step 1: Log in to Your Domain Provider Account & Select Your Domain
- Navigate to your domain provider’s website and log in with your credentials.
- Find the domain you want to use for the custom tracking domain.
Step 2: Manage DNS Records
- Go to the section where you can manage or edit DNS records for the chosen domain.
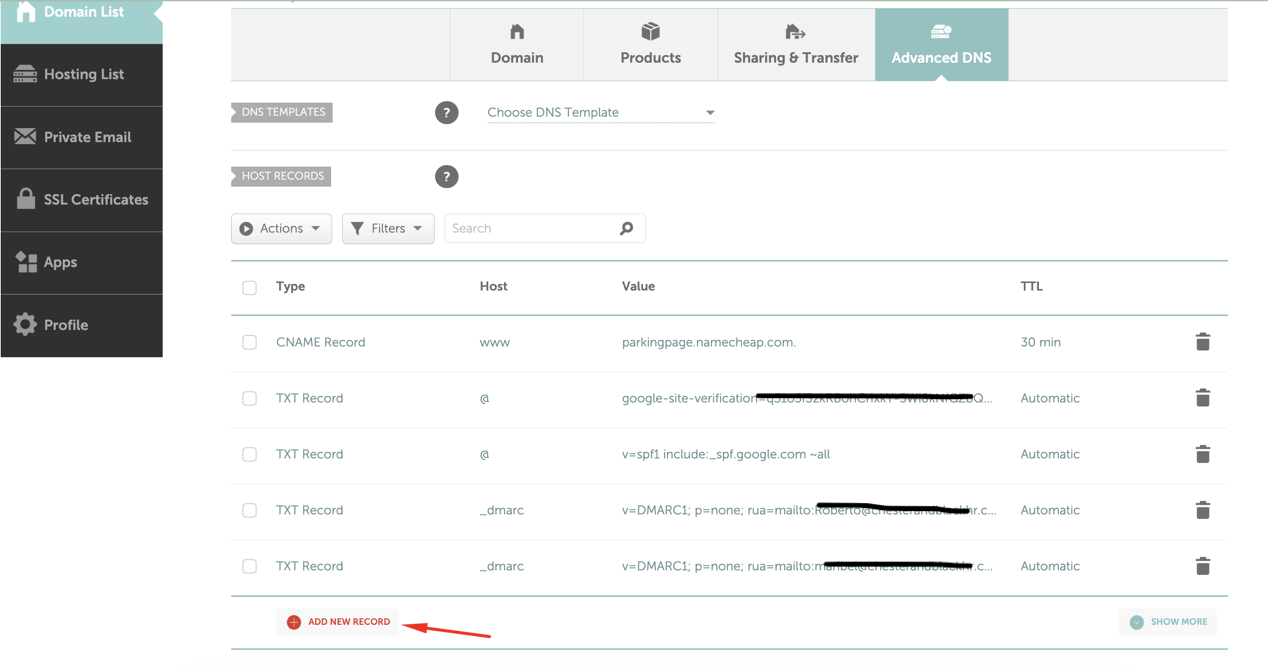
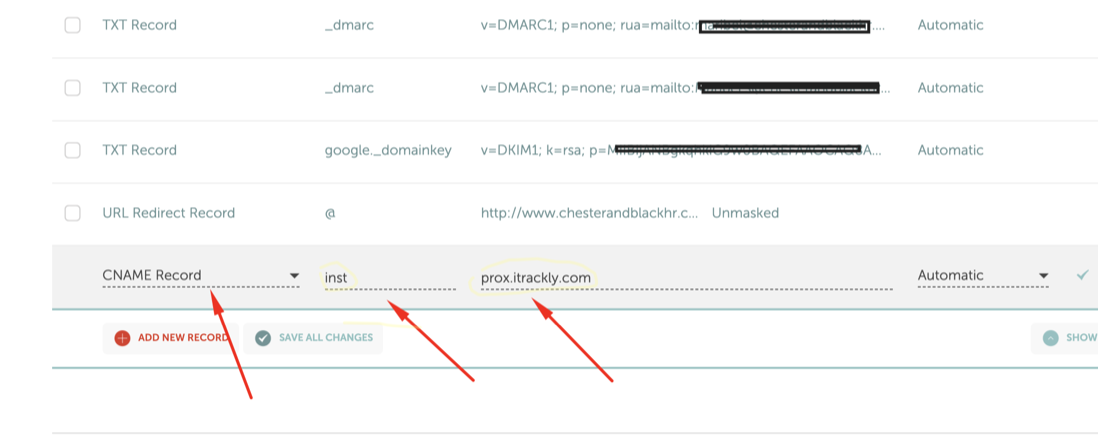
Step 3: Create a New CNAME Record
- Host (name):
inst - Type:
CNAME - Value:
prox.itrackly.com - Save the record and wait for it to propagate.
Step 4: Go to Your Instantly Account and Add CNAME Record in Account Settings
- Open Instantly and log in to your account.
- Navigate to Account Settings.
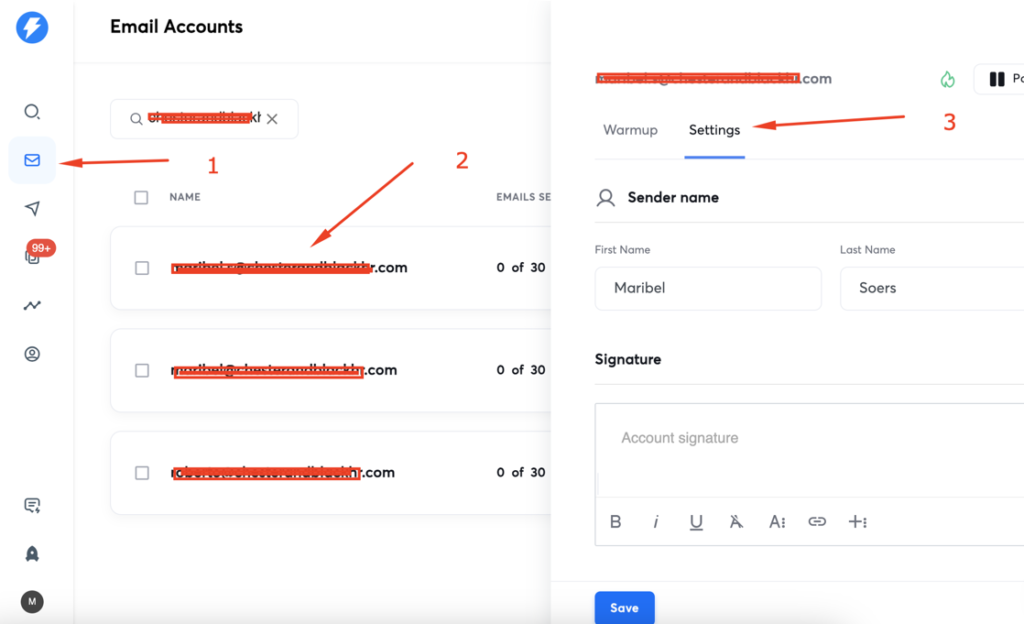
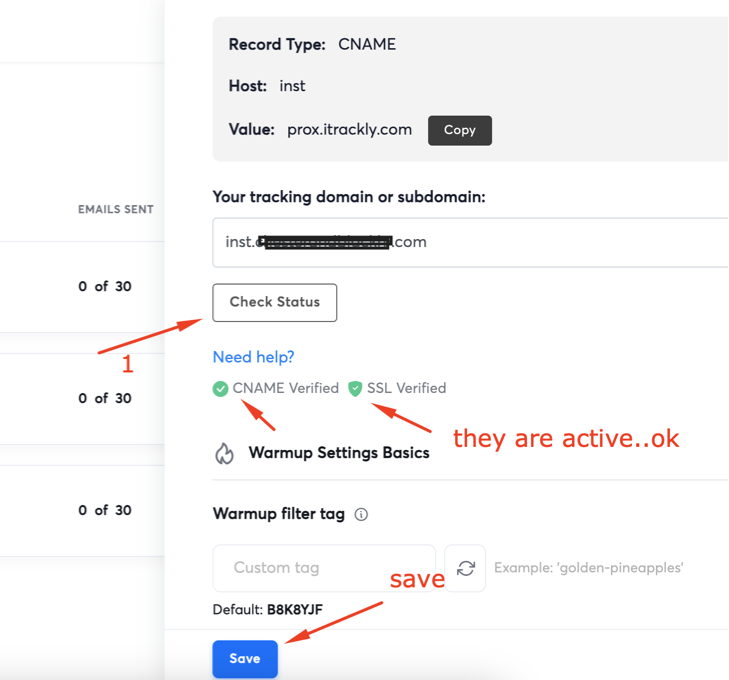
Step 5: Add the CNAME Record in Instantly
- Enter
inst.yoursendingdomain.com, whereyoursendingdomain.comis the domain you added the CNAME record for.
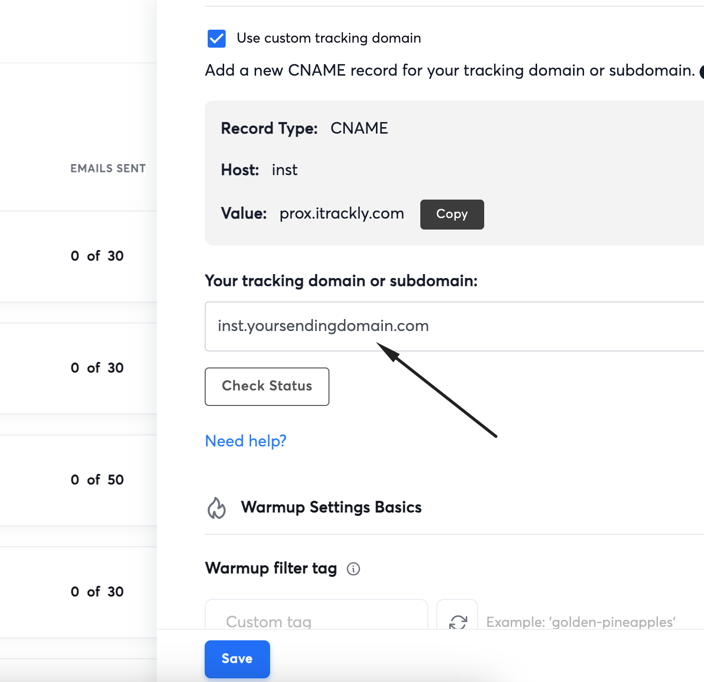
Step 6: Verify the Setup
- Click on ‘Check Status’. Ensure you see “CNAME Verified” and “SSL Verified”.
- Once both CNAME and SSL are verified, save your custom tracking domain.
Conclusion
Setting up a custom tracking domain is a crucial step in optimizing your email marketing efforts. It enhances deliverability, builds trust with your recipients, and provides accurate tracking and reporting. By following the steps outlined above, you can ensure your email campaigns are more effective and secure.
If you need help setting up a custom tracking domain or managing your Instantly account for cold email campaigns, you can hire an Instantly AI expert to assist you. This ensures that your email marketing strategy is professionally managed and optimized for the best results.

Hi, I’m Md Tangeer Mehedi — a Cold Email Outreach Specialist. I help B2B brands attract new leads and clients with proven outreach strategies. My focus is on appointment setting and building cold email systems that deliver consistent results.