To forward Zoho Mail to Gmail, you have to set up email forwarding within your Zoho Mail account. Here’s a step-by-step guide on how to do it:
Step 1: Log in to your Zoho Mail account.
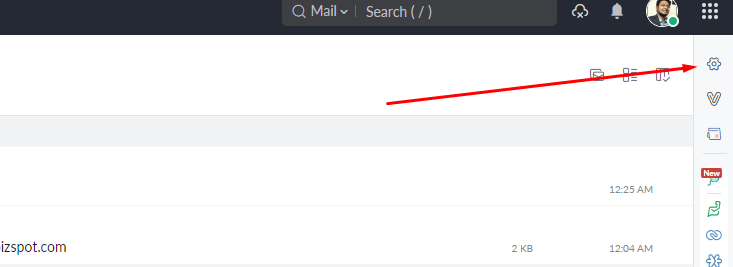
Step 2: Click on the gear icon (Settings) in the upper-right corner and select “Mail Accounts.”
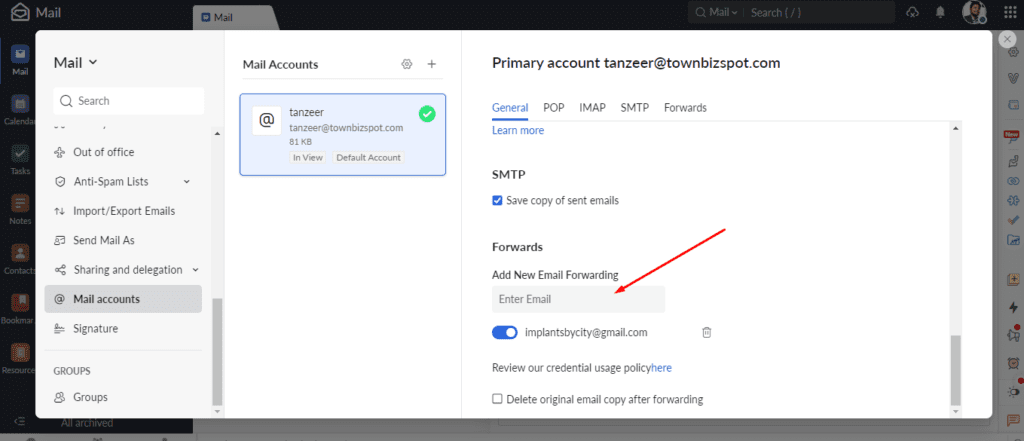
Step 3: In the Mail Accounts section, click on the “Forwarding and POP/IMAP” tab.
Step 4: Under the “Forwarding” section, click on the “Add Forwarding Address” button.
Step 5: Now, a pop-up window will appear. Enter your Gmail email address where you want your Zoho Mail emails to be forwarded, and then click on the “Add” button.
Step 6: Zoho will send a verification email to your Gmail address. So, go to your Gmail account, open the verification email from Zoho, and click on the verification link to confirm the forwarding.
Step 7: Once the verification is complete, go back to your Zoho Mail account and refresh the “Forwarding and POP/IMAP” tab.
Step 8: Under the “Forwarding” section, you’ll now find your Gmail address listed. Check the box next to “Enable” to activate forwarding.
Step 9: You may choose to keep a copy of the forwarded emails in your Zoho Mail inbox by checking the box “Keep a copy in the Inbox.” If you prefer not to keep a copy, leave it unchecked.
Step 10: Click on the “Save Changes” button to save the forwarding settings.
That’s it! Now all your incoming emails to your Zoho Mail account will be automatically forwarded to your Gmail address. However, keep in mind that it may take a few minutes for the changes to take effect.

Hi, I’m Md Tangeer Mehedi — a Cold Email Outreach Specialist. I help B2B brands attract new leads and clients with proven outreach strategies. My focus is on appointment setting and building cold email systems that deliver consistent results.